Adding a splitter kit to your car is an effective way to improve aerodynamics, increase downforce, and enhance the overall performance and appearance of your vehicle. A splitter, also known as an air dam, is typically mounted to the front bumper of a car and works by redirecting airflow to reduce lift and improve stability at high speeds.
Enhancing Aerodynamics: A Step-by-Step Guide to Fitting a Splitter Kit on Your Car
 By
shawn
By
shawn
In Car Guides
Guide to Fitting a Splitter Kit on Your Car
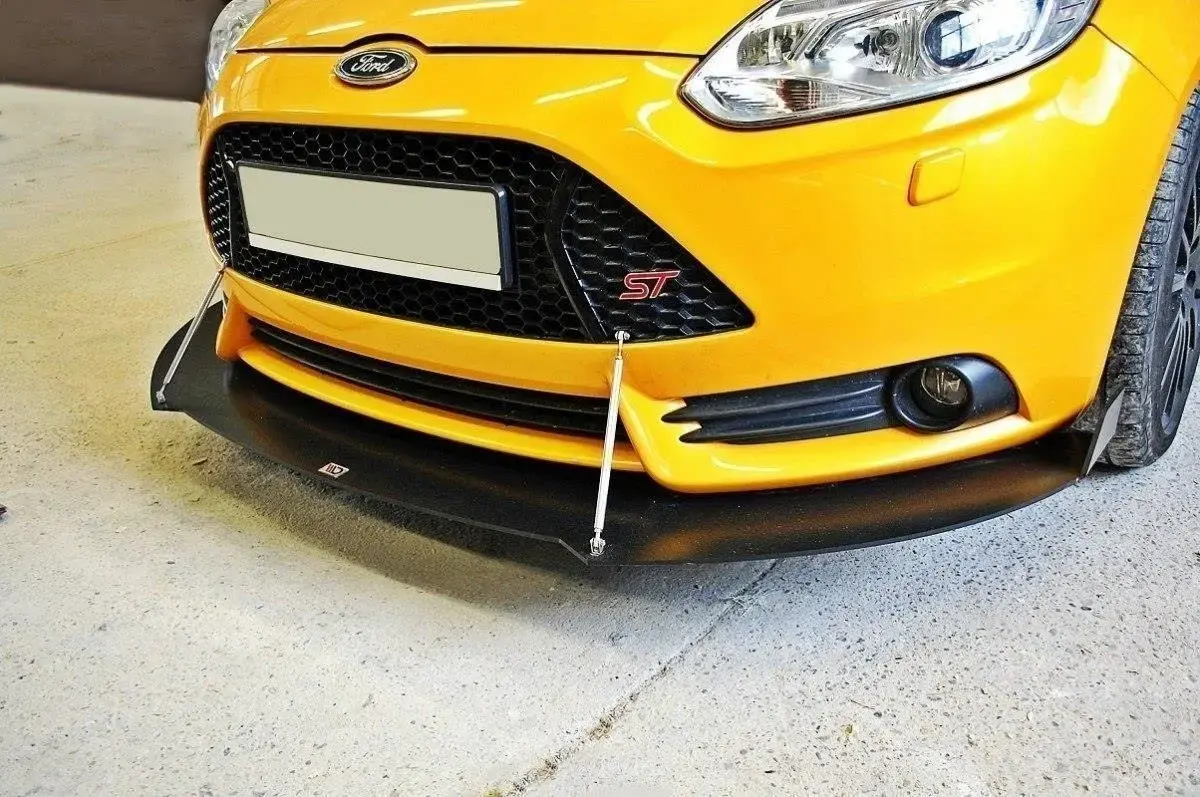
From selecting the right kit to proper installation techniques, you'll learn everything you need to know to take your car's aerodynamics to the next level.
Choosing the Right Splitter Kit
Before beginning the installation process, it's essential to choose the right splitter kit for your car. Consider factors such as your vehicle's make and model, desired level of performance enhancement, and budget. Research reputable splitter manufacturers and explore their product offerings to find a kit that fits your specific needs and preferences.
Preparing the Work Area
Select a clean and well-lit area to work on your car, preferably indoors to minimize the risk of dust and debris. Park the vehicle on a level surface and ensure there is ample space to manoeuvre around the front bumper. Gather all the necessary tools and equipment, including a jack, jack stands, socket set, wrenches, and masking tape.
Preparing the Car
Before installing the splitter kit, it's essential to prepare the front bumper of your car. Start by lifting the front of the vehicle using a jack and supporting it securely with jack stands. Remove any debris or obstructions from the front bumper and clean the surface thoroughly with soap and water to ensure proper adhesion.
Positioning the Splitter
Carefully position the splitter kit onto the front bumper of your car, aligning it with the contours of the bumper and ensuring proper fitment. Use masking tape to temporarily hold the splitter in place and make any necessary adjustments to achieve the desired position and alignment.
Marking Mounting Points
Once the splitter kit is properly positioned, use a marker or pencil to mark the mounting points on the front bumper. These points will serve as reference marks for drilling holes and securing the splitter to the bumper. Take your time to ensure accuracy and precision in marking the mounting points.
Drilling Holes
With the mounting points marked, carefully drill holes into the front bumper of your car using a drill and appropriate drill bit size. Take care to drill straight and clean holes to ensure proper alignment and fitment of the splitter kit. Use caution to avoid damaging the bumper or underlying components during the drilling process.
Installing Mounting Hardware
After drilling the holes, install the mounting hardware provided with the splitter kit. This typically includes bolts, nuts, washers, and brackets designed to secure the splitter to the front bumper. Follow the manufacturer's instructions carefully to ensure proper installation of the mounting hardware.
Attaching the Splitter
With the mounting hardware in place, carefully attach the splitter to the front bumper of your car. Align the mounting holes on the splitter with the corresponding holes drilled in the bumper and secure the splitter using the provided bolts, nuts, and washers. Use a socket set or wrench to tighten the mounting hardware to the manufacturer's specifications.
Final Adjustments
Once the splitter is securely attached to the front bumper, make any final adjustments to ensure proper fitment and alignment. Check that the splitter is level and parallel to the ground, and adjust as necessary to achieve the desired appearance and aerodynamic performance.
Testing and Evaluation
After completing the installation, take your car for a test drive to evaluate the performance of the splitter kit. Pay attention to changes in handling, stability, and aerodynamic balance, especially at high speeds. Make any necessary adjustments to optimize the performance and appearance of the splitter.
Fitting a splitter kit on your car is a rewarding project that can enhance both the performance and aesthetics of your vehicle. By following the step-by-step instructions outlined in this guide and exercising patience and precision, you can achieve professional-looking results without the need for professional installation. Remember to take your time, work carefully, and enjoy the process of customizing your car to your liking.
Related posts

In Car Guides
Are Your Car Mods Boosting Performance or Hurting It?
Car modifications can transform your ride, but not every upgrade delivers the results you expect. Some mods unlock performance, while others cause hidden problems. In this guide, we’ll break down how to spot effective upgrades, identify warning signs, and decide when it’s time to let go of a modification.

In Car Guides
How to Clean Your Car in Winter
Winter’s harsh conditions can damage your car’s paint, undercarriage, and interior. Regular cleaning prevents rust, maintains visibility, and keeps your ride in top shape. Here’s how to do it right.

In Car Guides
Cheapest Hatchback Cars in 2025: Top 7 Affordable Options
Hatchbacks are a top choice for budget-conscious drivers. They’re compact, practical, and affordable, making them perfect for first-time buyers or anyone looking to save money.

In Car Guides
How to Jump Start a Car Battery: Step-by-Step Guide
Learn how to jump start a car battery with this easy, step-by-step guide. Discover tips on using jumper cables and safely jump-starting a dead battery.
Add a comment