
Unlock Your Car's Full Potential: Learn How to Properly Set Up Coilovers for Enhanced Handling and Performance, Avoiding Common Handling Issues.
How to Install Coilovers on your car - A step by step guide
Improper configuration of coilovers stems from the widespread misinformation within the automotive industry. Compounded by conflicting recommendations from different coilover manufacturers, many car enthusiasts struggle to achieve optimal setup, leading to a host of handling issues.
In this comprehensive guide, we delve into the nuances of coilover setup, providing clarity and actionable steps for achieving peak performance. Whether your coilovers feature two points of ride height adjustment or a single point, we'll walk you through the correct setup procedures. Through clear explanations and detailed illustrations, you'll gain a deep understanding of essential adjustments such as damper body height and spring base height. By the end of this article, you'll be equipped with the knowledge and skills to fine-tune your coilovers effectively, ensuring improved handling and efficiency on the road.
When dealing with dampers featuring a single point of adjustment, the flexibility lies solely in adjusting the spring base height. However, with dampers boasting dual points of height adjustment, a broader spectrum of customization is unlocked, empowering enthusiasts to meticulously refine the bump to droop ratio of the damper stroke. This level of precision tuning is particularly advantageous for optimizing the handling dynamics of track cars, where even the slightest adjustments can significantly impact performance and cornering prowess. Whether you're wielding a single-point or dual-point adjustment system, our comprehensive guide will elucidate the intricacies of each setup, equipping you with the expertise needed to extract maximum performance from your coilovers.
Preload
Before delving into setting the damper's ride height, it's imperative to understand and address the consequences of pre-load adjustment. Pre-load adjustment is a critical aspect often clouded by misinformation within the automotive community. Contrary to popular belief, pre-load doesn't always exist in the manner many assume.
Primarily utilized in conjunction with linear rate coil springs, pre-load adjustments aim to optimize suspension performance. When applying a force to compress a linear coil spring, such as 100kg, the spring's rate remains constant at, for instance, 10kg/mm. Consequently, the spring compresses by a corresponding 10mm. This linear relationship continues with additional force application; for instance, adding another 100kg would result in an additional 10mm of compression.
Understanding the implications of pre-load adjustments is pivotal, as it directly influences suspension behavior and overall vehicle dynamics. Our comprehensive guide not only elucidates the fundamentals of pre-load adjustment but also provides practical insights into optimizing your suspension setup for enhanced handling, stability, and performance on the road or track.

In the provided diagram, it's essential to discern the fundamental disparity between the first and third springs depicted. Spring 3, having undergone compression, now harbors accumulated energy and a propensity to expand. Conversely, when the mass of your vehicle rests upon spring one, it inherently stores a comparable amount of energy, rendering the concept of "preload" somewhat redundant in this context.
However, it's crucial to acknowledge that if a spring is compressed to the extent that its coils begin to bind at maximum droop, the spring rate can be adversely affected by the inactive coils. In such instances, remedial measures may include either opting for shorter springs with identical spring rates or eliminating any auxiliary helper springs that may be present.
It's pertinent to note that pre-load exclusively manifests in the case of variable rate coil springs, which exhibit distinct spring rates across different sections, adjusting dynamically as the spring compresses. While this configuration is relatively uncommon, its operational dynamics necessitate careful consideration, as the amount of compression at ride height directly impacts the spring rate at each corner of the vehicle.
Nevertheless, it's imperative to underscore that linear rate springs prevail as the predominant choice across a myriad of applications, including motorsport endeavors. Our comprehensive guide demystifies these nuanced concepts, empowering enthusiasts to navigate the complexities of suspension setup with confidence and precision, ultimately optimizing vehicle performance and handling characteristics.
Setting Damper Travel
When fine-tuning the damper setup on your vehicle, ensuring adequate bump and droop travel is paramount to optimize performance. A general rule of thumb for most vehicles dictates that approximately two-thirds of the available travel should be allocated to bump, while the remaining one-third should be designated for droop when the vehicle is at ride height.
To achieve this balance, begin by disengaging the damper's spring and measuring the length of the damper shaft protruding from the damper body when fully extended. Next, compress the damper entirely and note the length of the protruding damper shaft in this position. With these measurements in hand, you can then utilize the following equation to calculate the total available damper travel:

With damper travel calculated you can now calculate the amount of droop travel for your damper:

With your droop travel calculated you can now calculate bump travel for your damper using:

Properly installing the damper onto your vehicle is a crucial step, especially when considering race regulations that often stipulate specific front and rear ride height restrictions. Before attaching the wheels, utilize jacks, axle stands, or wood to elevate your chassis to meet these minimum ride height requirements at both the front and rear ends.
To fine-tune the bump to droop ratio, which we previously measured, utilize the damper body height adjustment. In the animation below, we've emphasized the damper rod to illustrate the desired droop travel (highlighted in red) and bump travel (highlighted in green) that should be achieved from the damper. Aligning the top of the damper body with the line between the red and green zones using the damper body adjustment ensures the appropriate balance of bump and droop travel.
Next, raise the wheel until the bump stop engages, ensuring it remains in position without contacting the bodywork or wheel arch. If interference occurs, you may need to adjust the car's ride height accordingly. Options include increasing the ride height by the remaining amount of damper travel or modifying the bodywork to accommodate the wheel.
If the tire contacts the outer wheel arch, evaluate the camber settings, as improper alignment may contribute to interference. Alternatively, if necessary, utilize the lower damper height adjustment to reduce bump travel, though this should be considered a last resort due to its potential impact on the bump to droop ratio.
Once the damper setup is optimized, reinstall the coil spring onto the damper. Lower the car to the ground and assess the ride height, adjusting the lower spring platform as needed to achieve the desired height based on regulations or personal preference. Minor compression of the spring during adjustment is normal, but if the coils bind excessively, consider installing a shorter spring with equivalent stiffness.
Finally, jack up the car to fully droop the damper, ensuring the spring remains captive between the upper and lower mounts. Lock off the lower spring perch collars if the main spring is secure, or install a helper spring if necessary to maintain captivity under maximum droop. Recheck the ride height post-modification, as further tweaks to the spring platform may be required for optimal setup.
With these adjustments completed, your coilover setup is now properly configured and ready for use, delivering enhanced performance and handling characteristics on the road or track.
Doubts

The prevalent methods of setting up dampers have often been rooted in misinformation, perpetuated by various sources including coilover manufacturers themselves. Despite the quality of these products, some lack essential background information that should accompany them during production and in fitting manuals. While this doesn't necessarily undermine the quality of the goods, it underscores the importance of accurate guidance in achieving optimal setup.
Notably, brands like KW or AST often offer coilovers featuring only spring platform adjustments, omitting damper body ride height adjustments. This design choice stems from their meticulous engineering process, where they pre-set the optimal ride height and bump-to-droop ratio for the intended use of the damper. In such cases, the spring platform serves as the primary means for customizing ride height to individual preferences. However, brands like Ohlins provide an added advantage with damper body adjustments, empowering users to fine-tune the bump and droop ratio for their specific setup.
To illustrate the significance of proper setup, consider a scenario where you're transitioning from a 26Kg spring to an 8Kg spring while maintaining the same unsprung duration. Although an extreme case, it highlights a crucial point. If you were to adjust the ride height using the lower spring platform, attaching the softer spring would result in raising the car and pulling the damper piston up within the damper frame, effectively restoring the bump travel to its intended setting. This method achieves both the desired ride height adjustment and preserves the damper ratio for optimal performance.
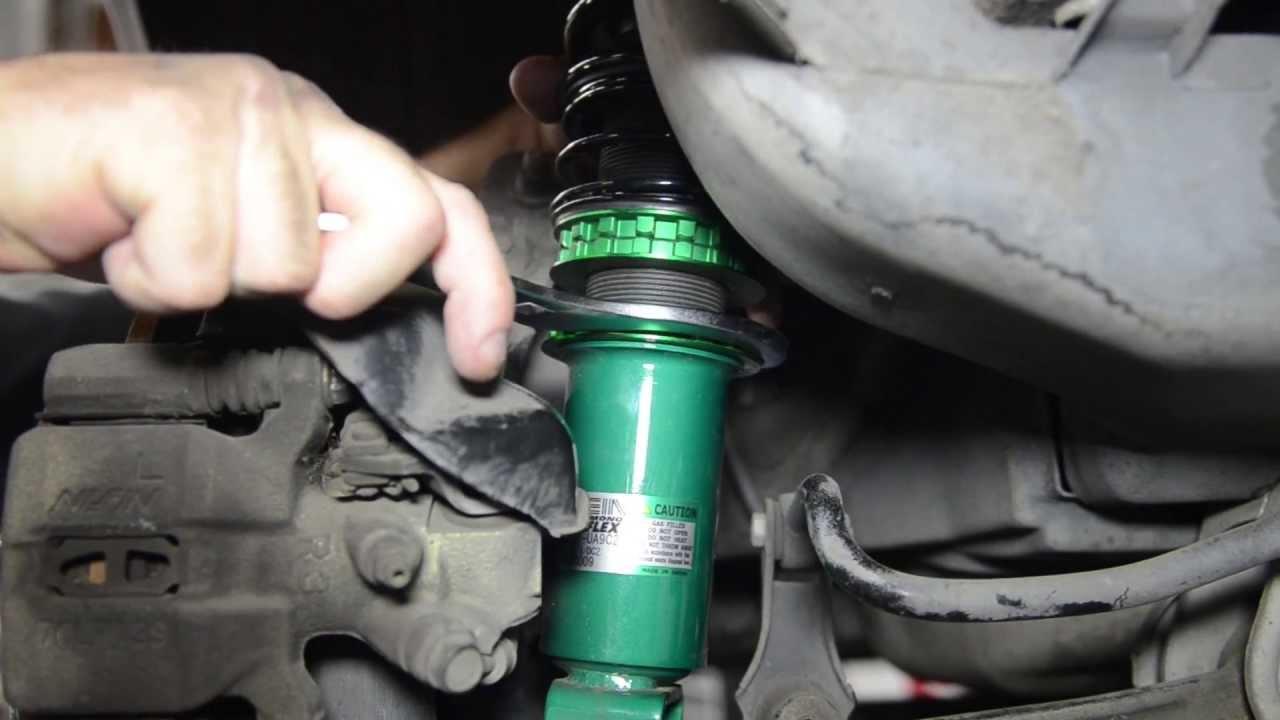
Handy Video On Installing Coilovers
Please leave a comment below if this coilover guide has helped you change your car by installing coilovers.
Comments
-
 Hi this is a great article
Add a comment