
Wheel spacers are a popular modification among automotive enthusiasts looking to improve the appearance and performance of their vehicles. By widening the track width, wheel spacers can enhance stability, cornering grip, and overall aesthetics.
How to Install Wheel Spacers on Your Car
In this in-depth guide, we'll delve into the process of installing wheel spacers, covering everything from choosing the right spacers to the step-by-step installation procedure. Whether you're a seasoned gearhead or a novice enthusiast, this article will equip you with the knowledge and confidence to undertake this modification with precision and safety.
Understanding Wheel Spacers
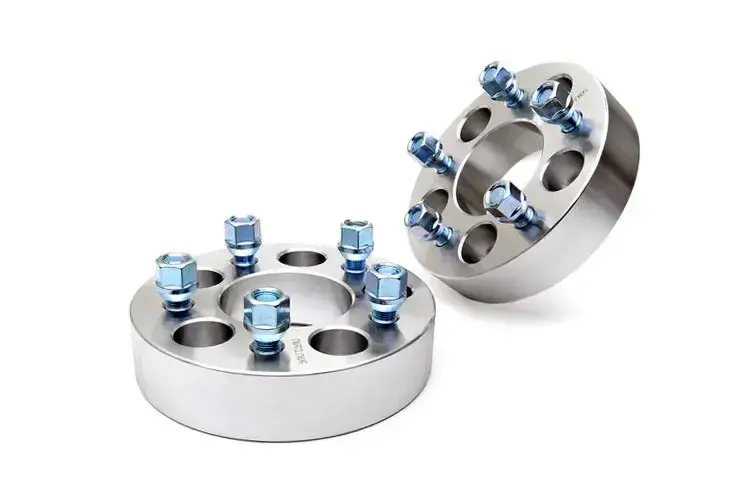
Before diving into the installation process, it's essential to grasp the purpose and function of wheel spacers. Wheel spacers are metal or aluminium discs that are mounted between the wheel hub and the wheel itself. By pushing the wheel outward, wheel spacers effectively widen the track width, altering the vehicle's stance and offset.
Choosing the Right Wheel Spacers
Selecting the appropriate wheel spacers for your car is crucial to ensure proper fitment and performance. Consider factors such as bolt pattern, hub bore size, and spacer thickness. Consult your vehicle's specifications and research reputable brands to find the ideal spacers for your application.
Gathering the Necessary Tools
Before starting the installation process, gather all the necessary tools and equipment. This typically includes:
- Jack
- Jack Stands
- Lug Wrench
- Torque Wrench
- Pry Bar
- Rubber Mallet
ensure you have the correct size socket and extension for removing lug nuts.
Preparing the Vehicle
Park your car on a flat, level surface and engage the parking brake. Loosen the lug nuts on the wheels you'll be installing the spacers on, but do not remove them completely. Place wheel chocks behind the rear wheels to prevent the vehicle from rolling.
Lifting the Car
Using a jack, carefully lift the corner of the vehicle where you'll be installing the wheel spacers. Place jack stands under the frame or designated lift points for added safety. Ensure the vehicle is securely supported before proceeding.
Removing the Wheels
With the vehicle lifted and supported, remove the lug nuts and take off the wheels. Set them aside in a safe location, making sure to keep track of the lug nuts for reinstallation later.
Installing the Wheel Spacers
Position the wheel spacer onto the wheel hub, ensuring it sits flush against the mounting surface. Carefully thread the lug nuts onto the wheel studs by hand, tightening them evenly in a crisscross pattern. Use a torque wrench to tighten the lug nuts to the manufacturer's specifications, typically in stages to ensure proper seating.
Reinstalling the Wheels
With the wheel spacers securely in place, carefully lift the wheels back onto the wheel studs. Thread the lug nuts onto the studs by hand, ensuring they are properly aligned before tightening. Once again, use a torque wrench to tighten the lug nuts to the specified torque settings.
Lowering the Vehicle
Once all the wheels are securely fastened, carefully lower the vehicle from the jack stands using the jack. Remove the jack stands and lower the vehicle to the ground.
Final Checks
After lowering the vehicle, perform a final inspection to ensure all lug nuts are properly tightened and the wheels are seated flush against the wheel spacers. Double-check for any signs of rubbing or interference between the tires and fenders.
Test Drive
Before hitting the road, take your car for a test drive to ensure everything feels normal. Pay attention to any vibrations, pulling, or unusual noises, which may indicate improper installation or fitment issues.
Installing wheel spacers is a rewarding modification that can transform the appearance and performance of your vehicle. By following the steps outlined in this guide and exercising caution and precision, you can confidently undertake this project and achieve the desired results. Remember to prioritize safety and consult professional assistance if you encounter any challenges or uncertainties along the way.
Related posts

In Car Guides
How to Clean Your Car in Winter
Winter’s harsh conditions can damage your car’s paint, undercarriage, and interior. Regular cleaning prevents rust, maintains visibility, and keeps your ride in top shape. Here’s how to do it right.

In Car Guides
Cheapest Hatchback Cars in 2025: Top 7 Affordable Options
Hatchbacks are a top choice for budget-conscious drivers. They’re compact, practical, and affordable, making them perfect for first-time buyers or anyone looking to save money.
Add a comment